Prevent Winter Water Damage with 24 Hour Flood Fighters
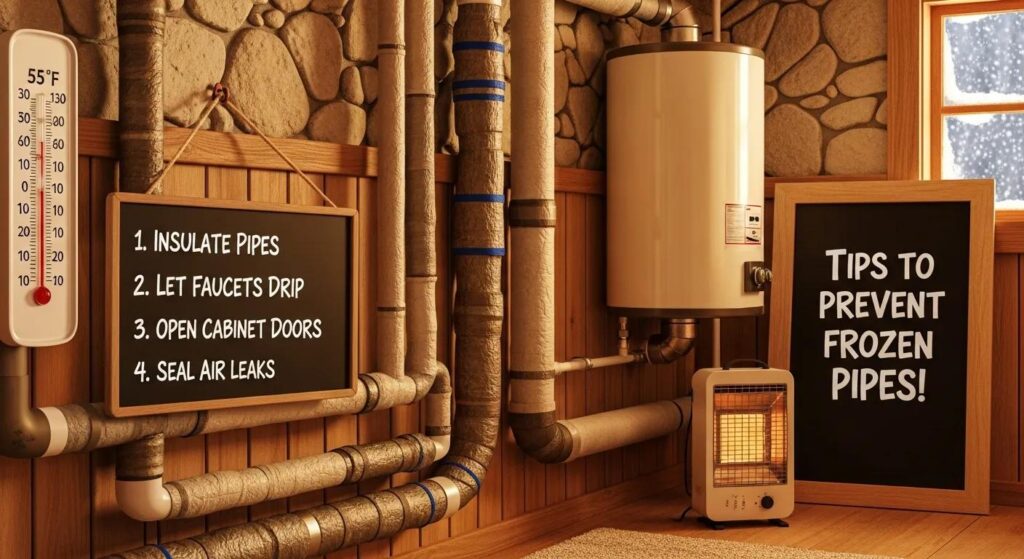
Frozen pipes are a leading cause of sudden, costly water damage in homes. When water freezes it expands, creating pressure that can split pipe walls and release large volumes of water. This guide explains why pipes freeze, where they’re most likely to fail, and practical steps homeowners can take to prevent bursts and the damage that follows. You’ll get clear advice on choosing and installing insulation, winterizing outdoor plumbing, managing indoor heat, and spotting — and safely thawing — frozen lines before they break. We also list immediate, prioritized actions to limit damage if a pipe does burst, plus region-specific tips for Middle Tennessee residents in Nashville, Murfreesboro, and nearby communities. Throughout, you’ll find useful search phrases like how to prevent frozen pipes, pipe insulation for winter, and burst pipe emergency service to help you find the right resources quickly.
What Causes Pipes to Freeze and How That Leads to Water Damage
What you should know
Pipes freeze when the water inside loses heat faster than it can be replaced, turning to ice and raising internal pressure. That pressure can crack or burst the pipe and send pressurized water into living areas. The risk grows when plumbing sits in cold pockets — exterior walls, attics, crawlspaces, or unheated garages — or when insulation is thin and a rapid temperature drop overwhelms home heating. Different materials respond differently: rigid copper is more likely to split under extreme pressure, while flexible PEX tolerates more expansion but can still fail at fittings. Understanding these forces helps you target insulation and operational fixes that reduce the chance you’ll need water damage restoration.
At What Temperature Do Pipes Usually Freeze and Burst?
Water freezes at 32°F (0°C), but pipes can ice over at higher ambient temperatures inside wall cavities or crawlspaces if insulation is poor or wind strips heat away. Sudden cold snaps increase risk because trapped water can’t circulate and equalize. Gradual temperature drops give your home’s heat and stored warmth a better chance to protect pipes. Metal pipes conduct heat away faster than plastic ones, so exposed copper along exterior walls is especially vulnerable during prolonged sub-freezing stretches. As a practical guideline, treat sustained temperatures below about 45°F (7°C) in cavities or unheated spaces as elevated risk and take protective steps before conditions approach freezing.
Which Areas of Your Home Are Most Vulnerable to Frozen Pipes?
Pipes routed through exterior walls, uninsulated attics and crawlspaces, cold basement corners, garages, and unfinished utility rooms are the usual hotspots. These spaces often lack continuous insulation and can form thermal bridges at siding, framing, or vents that accelerate heat loss. Plumbing near windows, doors, or rim joists is particularly exposed. In Middle Tennessee, older homes, slab foundations with exterior runs, and limited retrofit insulation concentrate risk in predictable zones — inspect these areas every fall so you can prioritize fixes that meaningfully reduce freeze and water-damage likelihood.
Best Winter Pipe Insulation Methods to Prevent Freezing
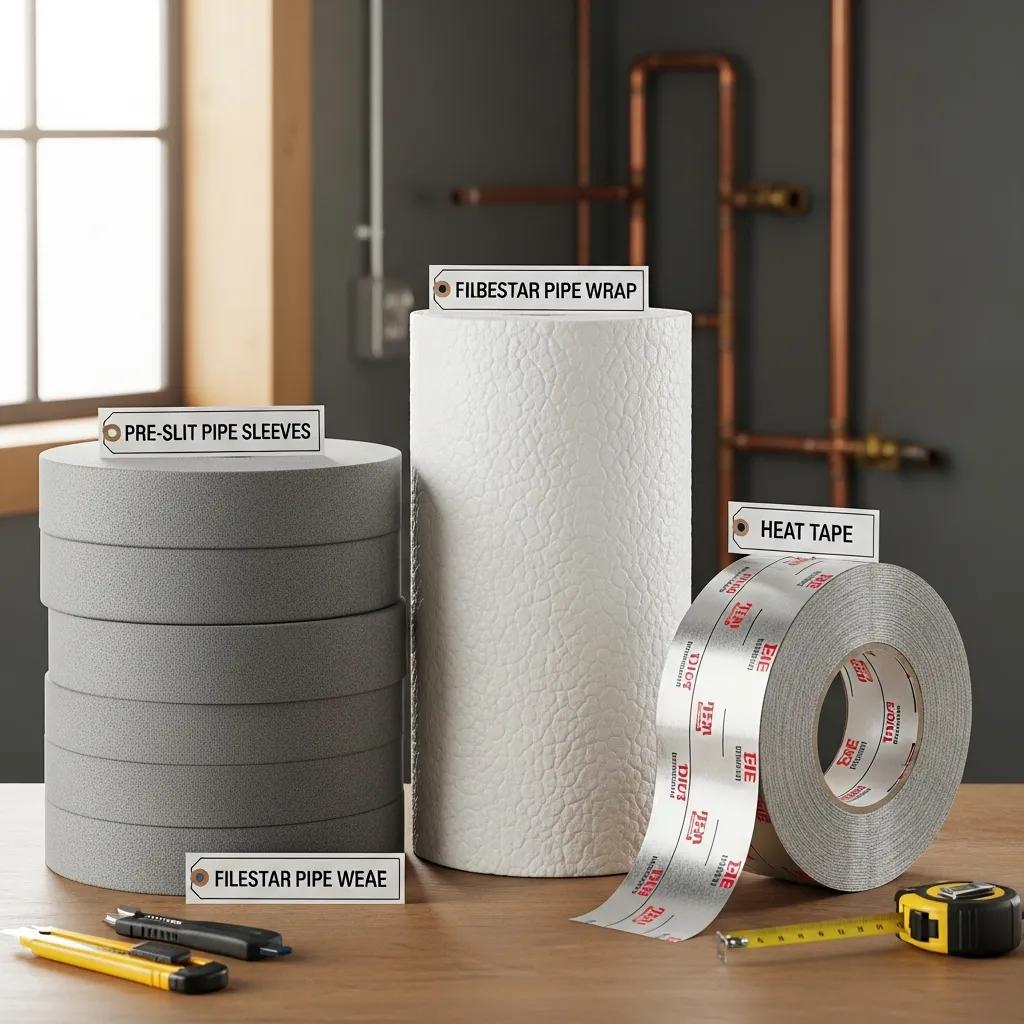
Good pipe insulation slows heat loss and helps keep water above freezing by forming a thermal barrier around the pipe. The right choice depends on where the pipe runs, how much room you have, and whether you want a DIY solution or a professional retrofit. Common options include slip-on foam sleeves for exposed indoor plumbing, fiberglass wrap for odd shapes or larger diameters, and electric heat tape for runs that face extreme cold or big temperature swings. Proper installation matters as much as the material: seal joints, insulate elbows and fittings, and close gaps — even small uninsulated sections become freeze points. The table below lets you compare options by insulation value, cost, and ease of installation.
Different insulation materials trade off R-value, price, and installation effort:
- Foam sleeve: Approx. R-value: R-3 to R-4, Typical Cost Estimate: Low ($ per linear foot), Ease of DIY Installation: Very easy — slip on and tape seams
- Fiberglass wrap: Approx. R-value: R-2 to R-3 (with jacket), Typical Cost Estimate: Low–moderate, Ease of DIY Installation: Moderate — better for odd shapes
- Heat tape (heating cable): Approx. R-value: N/A (active), Typical Cost Estimate: Moderate, Ease of DIY Installation: Moderate — follow manufacturer safety instructions
- Spray foam (cavity): Approx. R-value: R-6+ (structural), Typical Cost Estimate: Moderate–high, Ease of DIY Installation: Difficult — usually a professional job
- Closed-cell rubber: Approx. R-value: R-4 to R-6, Typical Cost Estimate: Moderate–high, Ease of DIY Installation: Moderate — good for outdoor-exposed runs
Which Pipe Insulation Materials Give the Best Protection?
Foam sleeves are the most common first choice for exposed indoor plumbing — inexpensive, easy to fit, and effective when seams are sealed. For severely exposed lines, heat tape provides active warmth and is often the right call (install exactly to the manufacturer’s instructions to avoid hazards). Fiberglass with an outer jacket works well on larger pipes and awkward fittings; spray foam or cavity insulation is best for stopping heat loss at rim joists and inside walls but should be handled by pros to avoid moisture problems. Choose materials by balancing R-value, cost, installation difficulty, and the pipe’s location.
How to Install Pipe Insulation for Best Results
When practical, shut off and drain the section before starting, then dry the pipe and measure so pieces meet without gaps. Wrap elbows and fittings first and secure seams with approved tape or clamps to create continuous coverage. For foam sleeves, slit lengthwise, slip over the pipe, compress and seal the seam; for heat tape, run it along the pipe and cover with manufacturer-approved insulation without overlapping the tape. Pay special attention where pipes enter exterior walls or pass through rim joists — those joints often need extra sealing or a combined approach. If access is limited or the job requires opening walls, hire a professional to ensure long-term effectiveness and code compliance.
Protecting Outdoor Plumbing and Managing Indoor Temperatures in Cold Weather
Outdoor plumbing and its shut-offs are common winter failure points. Helpful steps include disconnecting and storing hoses, draining exterior lines, installing frost-proof spigots or interior shut-off valves, and using insulated faucet covers. Inside, keep a safe baseline thermostat setting, open cabinet doors under sinks so warm air reaches pipes, and consider zoning or programmable thermostats to focus heat where it’s needed. The short comparison table below lists common outdoor winterization measures so you can choose based on difficulty, cost, and use case. Doing these tasks before the first hard freeze is usually the most cost-effective way to avoid frozen pipes and the emergency water extraction and restoration that follow.
- Spigot cover: Difficulty: Easy, Typical Cost: Low, When to Use: Quick, inexpensive protection
- Hose disconnect & drain: Difficulty: Easy, Typical Cost: Low, When to Use: Always do before freezing weather
- Interior shut-off for exterior faucet: Difficulty: Moderate, Typical Cost: Moderate, When to Use: Useful where freezing is frequent
- Frost-proof spigot replacement: Difficulty: Moderate–hard, Typical Cost: Moderate–high, When to Use: Long-term fix for exposed spigots
- Insulated exterior valve box: Difficulty: Moderate, Typical Cost: Moderate, When to Use: When shutoffs sit in cold, unheated spaces
Best Practices for Winterizing Outdoor Faucets and Hoses
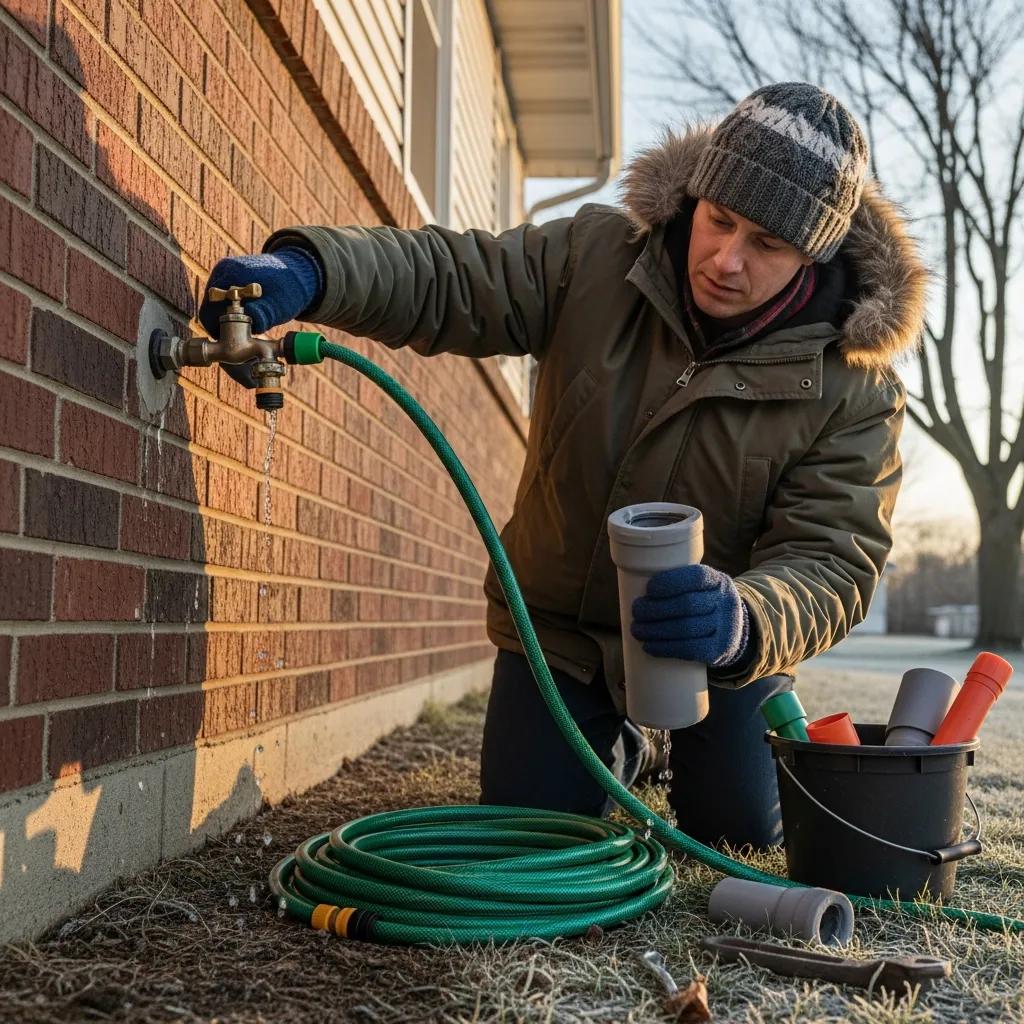
Start by disconnecting and storing hoses, open outside faucets to drain remaining water, and fit insulated faucet covers to block wind and radiative heat loss. If your home has an interior shut-off for the exterior faucet, close it and drain the line; if not, consider adding one before winter so future winterizing is easier. For long-term protection, think about frost-proof spigots or relocating exposed runs into conditioned space during renovations — especially where freezes occur repeatedly. Properly winterizing outdoor plumbing reduces strain on indoor systems and works with thermostat strategies for overall pipe protection.
How to Set Your Thermostat to Help Prevent Frozen Pipes
Maintain a reasonable baseline temperature during cold snaps — many pros recommend not dropping indoor temps below about 55°F for extended absences — and use zoning or programmable settings to direct heat to plumbing-vulnerable areas. Smart thermostats with remote alerts can warn you of sudden drops so you can act before pipes freeze. Opening interior doors to let warm air reach exterior walls and opening sink cabinet doors can also raise pipe temperatures. The small cost of keeping modest heat is usually far less than repairing water damage from a burst pipe, so pair thermostat management with targeted insulation for the best balance of safety and efficiency.
Signs of Frozen Pipes and How to Thaw Them Safely
Spotting frozen pipes early lets you thaw them safely and restore flow before pressure causes a rupture. Common signs include a sharp reduction or complete loss of water flow at a fixture, visible ice or frost on exposed pipes, and gurgling, banging, or knocking noises when you try to run water.
- Watch for reduced or no water flow at taps, visible frost or condensation on pipes, and strange noises like knocking when water is turned on.
- Other clues include unusually cold cabinet interiors under sinks, chilled floor areas above plumbing runs, or sudden pressure drops when several fixtures run at once.
- If you see wet spots, discoloration, or unexplained moisture near pipe runs after attempting a thaw, treat the situation as a possible burst and move to emergency containment steps immediately.
Early detection and careful thawing prevent most failures — knowing these warning signs helps you act quickly to protect your home and reduce restoration needs.
How to Recognize a Frozen Pipe Before It Bursts
A frozen pipe often shows up first as reduced or no flow at a single fixture while others still work. Inspect accessible runs for frost or an unusually cold pipe. Listen for creaks or high-pitched knocking when water is turned on — those sounds can mean ice or stress inside the line. Check cabinets, attics, and crawlspaces for frost or drafts that could chill pipes. A quick, methodical check during cold weather — testing fixtures and scanning exposed plumbing — helps you find and address freezes before pressure leads to a rupture and the need for emergency extraction or mold remediation.
Safe DIY Methods for Thawing Frozen Pipes
Thaw pipes slowly, starting at the faucet and working back toward the frozen section. Keep the faucet open so melting water can flow and relieve pressure. Use a hair dryer, heat lamp, or warm towels to apply even heat; a portable electric heater can help if used safely. Never use open flames, torches, or high-heat tools that can scorch pipe insulation or surrounding materials. If thawing doesn’t work within 30–60 minutes, if pipes bulge, or if the freeze is hidden behind a wall with no access, stop and call a professional to avoid causing a burst. Gentle, consistent warming preserves pipe integrity and lowers the chance of catastrophic failure.
Immediate Steps to Take If a Pipe Bursts to Minimize Water Damage
When a pipe bursts, fast, focused action limits water spread and reduces the scale of restoration. Follow this priority sequence: shut off water, cut power to affected areas if it’s safe to do so, move valuables out of the water path, and begin temporary water removal while documenting damage for insurance. Keep a basic winter kit (flashlight, shut-off wrench, buckets, towels) within reach. After initial containment, call emergency restoration professionals for rapid extraction, thorough drying, and repair coordination — especially when structural materials are saturated or mold risk is rising. Take photos and make an itemized list of damaged items to support insurance claims and speed recovery when pros arrive.
- Shut off water at main valve: Estimated Time-to-Action: < 2 minutes, Tools Needed: Valve key or wrench, Risk if Delayed: High — continued flooding
- Turn off electricity in flooded areas: Estimated Time-to-Action: < 2 minutes (if safe), Tools Needed: Knowledge of breaker panel, Risk if Delayed: Very high — electrocution / fire risk
- Begin water containment & removal: Estimated Time-to-Action: 5–30 minutes, Tools Needed: Towels, buckets, pump, Risk if Delayed: High — damage to drywall and flooring
- Call emergency restoration professionals: Estimated Time-to-Action: 10–20 minutes, Tools Needed: Incident details, photos, Risk if Delayed: High — mold and structural damage
How to Shut Off Water and Prevent Further Damage After a Burst
Locate and turn the main shut-off valve to stop flow; if the leak is on a branch line and you know that shut-off, close it so water remains available elsewhere in the house. Don’t stand in standing water to operate breakers — if areas are wet, address electrical hazards first and switch power only from a dry location or call an electrician. Move valuables and electronics to higher ground and begin water removal with pumps or a wet/dry vac to reduce saturation. Photograph damage, keep receipts for emergency purchases, and record the steps you took — these actions stabilize the scene and prepare the property for professional mitigation to avoid mold and further structural harm.
Why Choose 24 Hour Flood Fighters for Emergency Water Damage Restoration?
24 Hour Flood Fighters is a local, family-owned restoration company serving Nashville, Murfreesboro, and surrounding Middle Tennessee communities. We provide 24/7 emergency response, IICRC-certified technicians, and direct coordination with insurance providers to help make claims and recovery smoother. Our team focuses on fast extraction, thorough drying, and proactive mold remediation to limit long-term structural and health risks after leaks, floods, or burst pipes. For homeowners who need experienced local help during or after an emergency, our round-the-clock availability, industry certification, and regional know-how reduce downtime and restoration costs. Contact qualified emergency restoration professionals as soon as safe containment steps are complete to start a rapid recovery.
How Middle Tennessee’s Climate Shapes Frozen Pipe Risks and Prevention
Middle Tennessee sees occasional cold snaps that can drop temperatures quickly below freezing. With housing that ranges from older, lightly insulated homes to newer builds, this creates pockets of risk where plumbing runs are exposed. Crawlspaces, rim joists, and slab foundations with exterior runs are common trouble spots during rare but intense freezes because they weren’t always designed for sustained sub-freezing conditions. Local prevention focuses on targeted insulation, pre-winter inspections, and simple operational changes — disconnect hoses, set thermostat baselines, and add interior shut-offs — to reduce the chance a late-season cold snap triggers emergency restoration.
Common Plumbing Challenges in Nashville and Murfreesboro Winters
Typical local vulnerabilities include older pipe materials with limited insulation, exterior runs near uninsulated rim joists, and homes over crawlspaces that let cold air reach plumbing surfaces faster than enclosed basements. Many houses show mixed retrofit work that leaves some runs exposed and others hidden, making consistent insulation harder. Homeowners often underestimate risk to pipes near exterior walls and in garages. Prioritizing insulation upgrades in crawlspaces and rim joists, insulating exterior-facing pipes, and ensuring easy access to shut-offs can dramatically reduce winter freeze incidents and the need for emergency restoration.
How Local Homeowners Can Prepare Plumbing for Middle Tennessee Cold Snaps
A preseason checklist for Middle Tennessee homeowners should include: seal gaps in exterior walls and rim joists, add or replace insulation on exposed runs, install interior shut-offs for exterior faucets, and practice locating and operating the main shut-off so it’s quick to use in an emergency. Schedule inspections and retrofits before winter to avoid last-minute delays, and use simple habits — leave a slow drip during extended cold, maintain a modest thermostat baseline during absences — to lower freeze risk. If you’re unsure about hard-to-reach shut-offs, cavity insulation, or electrical issues near plumbing, hire a qualified professional to evaluate and fix problems before the first hard freeze. Thoughtful, region-specific preparation is the most reliable way to avoid frozen pipes and the costly water damage that follows.
Frequently Asked Questions
What should I do if I suspect a pipe is frozen?
Look for reduced water flow or visible frost on the pipe. Open the connected faucet to relieve pressure, then try to thaw the pipe gradually from the faucet end toward the frozen section using a hair dryer or warm towels. Never use open flames or high-heat torches. If you can’t thaw the pipe within 30–60 minutes, notice bulging, or the freeze is hidden behind a wall, stop and call a professional to avoid a burst.
How can I tell if my insulation is adequate for winter?
Check for cold spots around pipes, especially in attics, crawlspaces, and exterior walls. If pipes feel cold to the touch or you notice drafts, your insulation may be inadequate. Inspect for gaps or missing sections and consider using a thermal camera for a clearer picture of heat loss. Upgrading insulation or adding approved heat tape in problem areas can significantly reduce freeze risk.
Are there specific plumbing materials that are more resistant to freezing?
Yes. PEX (cross-linked polyethylene) is flexible and tolerates some expansion, making it more forgiving during freezes. Copper is durable but rigid and more likely to split under freezing pressure. PVC and CPVC can become brittle in extreme cold. When replacing plumbing, consider PEX or ensure copper lines are well insulated.
What are the risks of ignoring frozen pipes?
Leaving frozen pipes untreated can lead to bursts that cause extensive water damage to walls, floors, and belongings, plus costly repairs and possible mold growth. The longer a freeze persists, the more pressure builds and the greater the chance of a rupture, which may require emergency professional intervention and raise repair costs and stress.
How often should I inspect my plumbing for winter readiness?
Inspect plumbing at least once a year, ideally each fall before the first hard freeze. Check for uninsulated pipes, gaps in insulation, and the condition of outdoor faucets. Verify your heating system and thermostat settings. Regular, pre-winter checks let you catch problems early and handle repairs before cold weather arrives.
Can I use space heaters to prevent frozen pipes?
Space heaters can help in drafty basements or crawlspaces, but use them carefully and follow manufacturer safety instructions to avoid fire risk. Keep heaters away from flammable materials and never leave them unattended. Combine space heater use with insulation and thermostat management for a safer, more reliable approach.
What should I include in my emergency water damage kit?
Keep a simple kit with a flashlight, a wrench or shut-off key for the main valve, buckets, towels, and a wet/dry vacuum if available. Add a list of emergency contacts (plumber, restoration service) and your insurance details. Having these items on hand speeds your response and limits immediate damage when a pipe fails.
Conclusion
Preventing water damage from frozen pipes is one of the best investments you can make before winter. With the right insulation, straightforward winterization steps, and a few simple habits, you can greatly reduce the chance of pipe bursts and the costly repairs that follow. Know your home’s vulnerable spots, prepare before the first freeze, and call qualified professionals when needed. For personalized advice or emergency help, explore our resources and services to keep your home safe all winter long.