Water Damage Restoration Process: Complete Guide to Steps, Timeline, Cleanup, Repair, and Cost
Water damage restoration is the structured sequence of emergency mitigation, water extraction, structural drying, cleaning, repair, and verification that returns a property to safe, habitable condition; understanding the restoration process helps homeowners act quickly and reduce long-term loss. For more comprehensive information on water damage, you can refer to external resources like this FEMA guide on water damage cleanup. This guide explains the water restoration process step by step, clarifies how cleanup and decontamination differ from repair, outlines realistic timelines for mitigation through rebuild, and breaks down the main cost drivers so you can estimate expenses and prepare for insurance interactions.
Many property owners face confusion about immediate safety actions, how professionals assess hidden moisture, and when mold remediation becomes necessary, and this article resolves these uncertainties with practical guidance, detection methods, and clear examples. You will learn how technicians perform moisture mapping and structural drying, what cleaning methods apply to Category 1–3 contamination, and how repair decisions are made when materials are saturated or compromised. The following sections cover essential emergency steps and inspection, the cleanup and decontamination workflow (including contents handling), the repair phase and finish work, realistic phase durations with a quick-reference table, and the cost breakdown with budgeting tips to prepare for estimates and insurer conversations.
What Are the Essential Water Damage Restoration Steps?
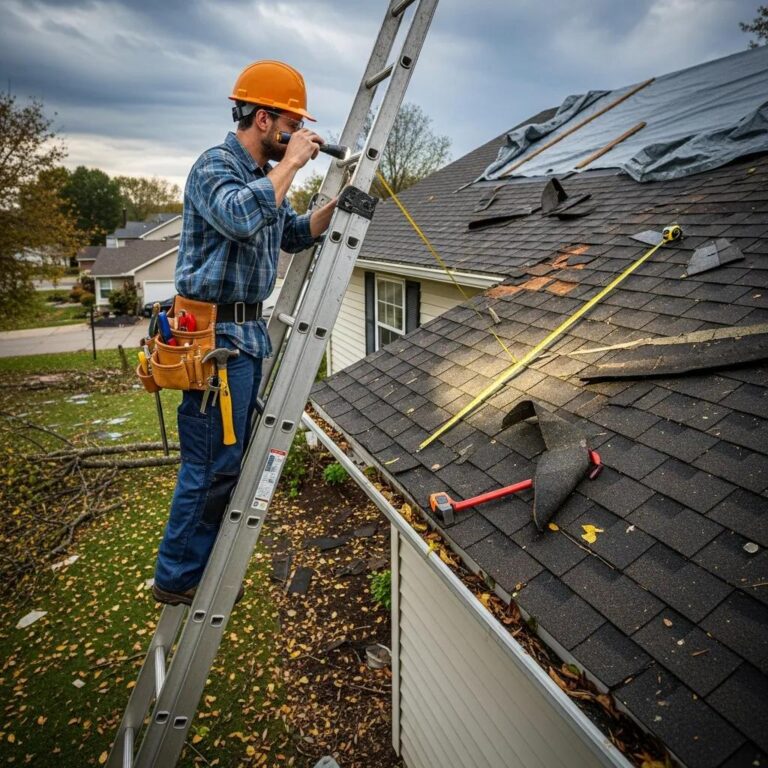
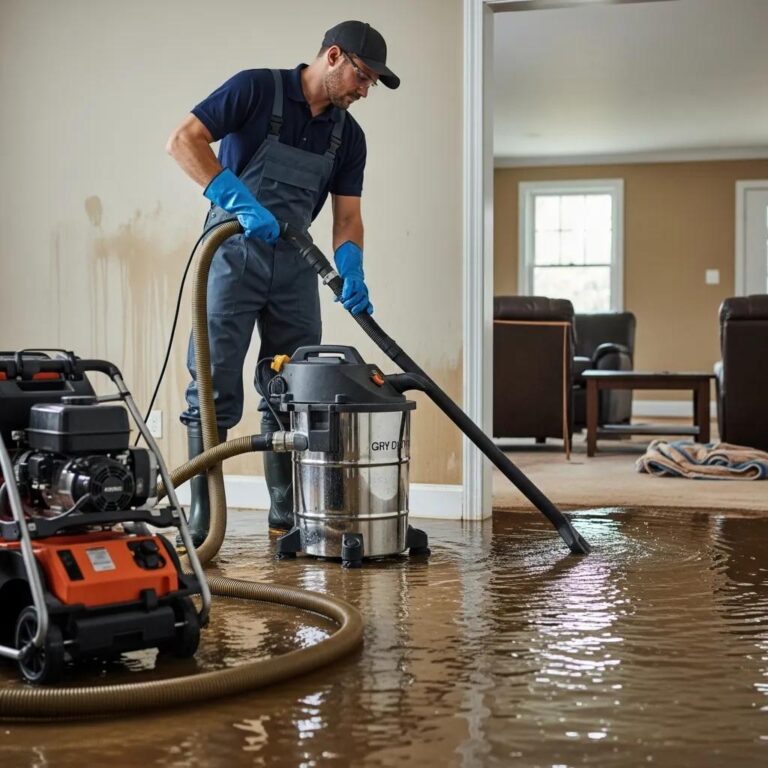
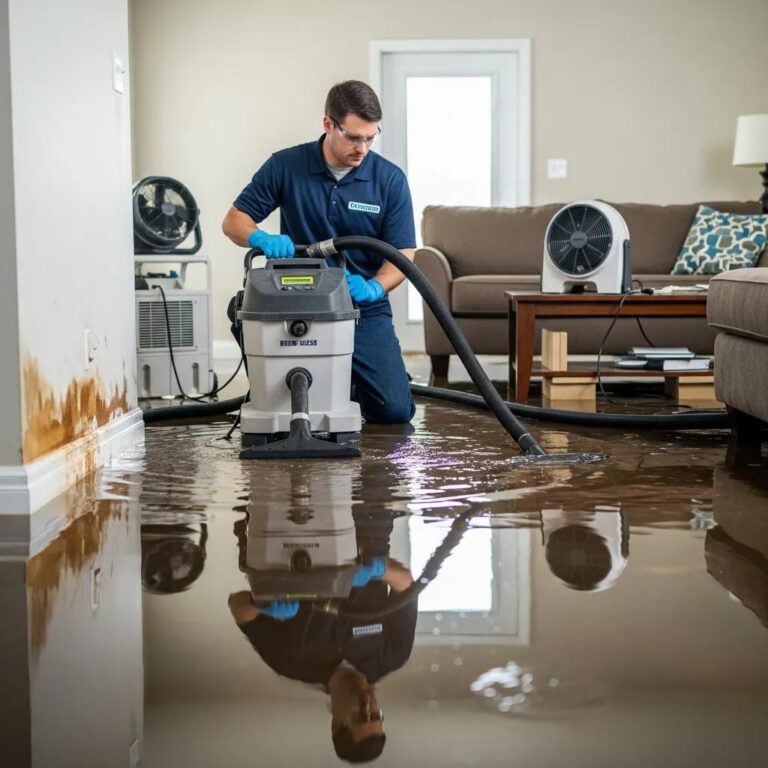
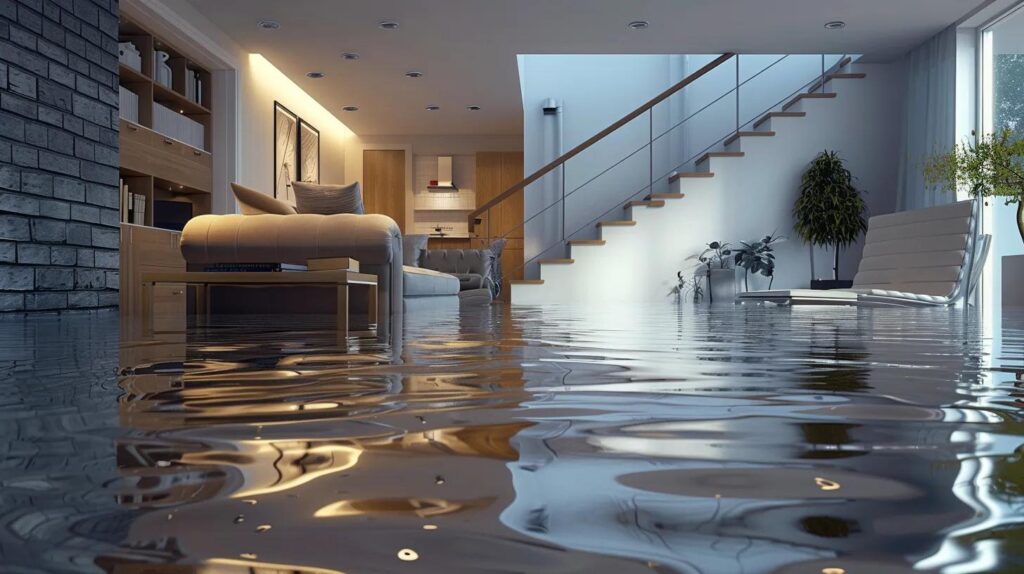
Water damage restoration begins with immediate safety and mitigation: stop the source of water, isolate electrical hazards, and limit the spread of moisture to unaffected areas so further damage is minimized. This step protects occupants and reduces secondary deterioration, and it sets the stage for quick water extraction and accurate documentation for claims. After safety and shutoff, technicians or homeowners perform emergency extraction using pumps or portable extractors, start containment with temporary barriers, and remove soaked materials that present immediate contamination risks. Rapid mitigation reduces drying time and lowers repair scope, and this sequence is the core of any water restoration response because extraction and containment directly affect structural drying success. The next paragraphs explain how to inspect damage comprehensively and which extraction and drying techniques are most effective in the structural drying phase.
This numbered list presents the practical emergency-first checklist homeowners and responders should follow while awaiting professional help:
- Ensure safety: Turn off electricity in affected areas and avoid standing water near outlets or appliances.
- Stop the source: Shut off main water or isolate leaking fixtures to prevent ongoing flooding.
- Limit spread: Move valuables off floors and use towels or barriers to contain moisture migration.
- Begin extraction: Remove standing water with pumps or wet vacuums; prioritize affected flooring and lower levels.
- Document damage: Photograph affected areas and take initial notes to support an insurance claim.
These steps focus on immediate loss control; following them reduces the area requiring full restoration and speeds subsequent inspection and drying.
How to Assess and Inspect Water Damage Effectively
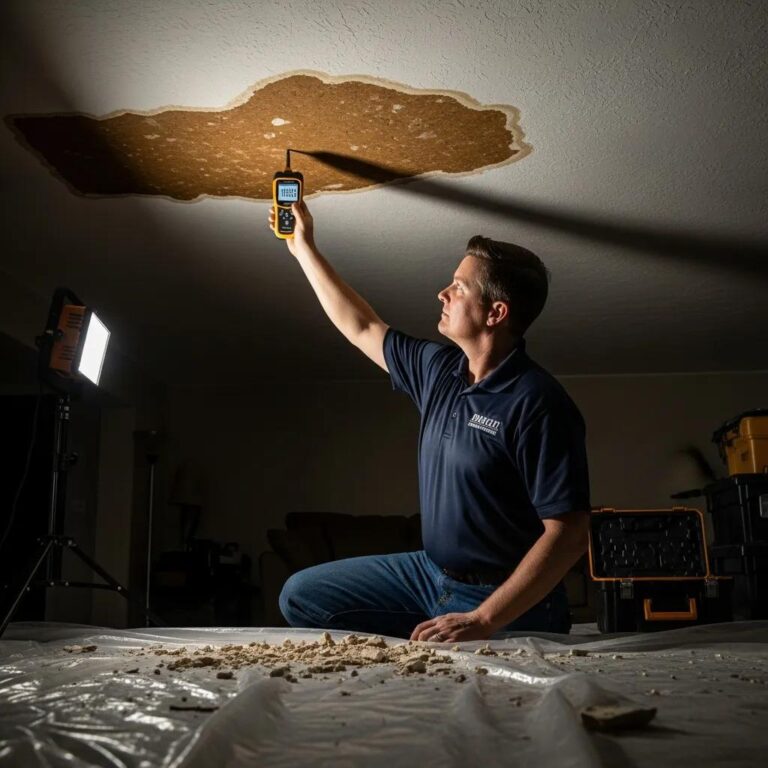
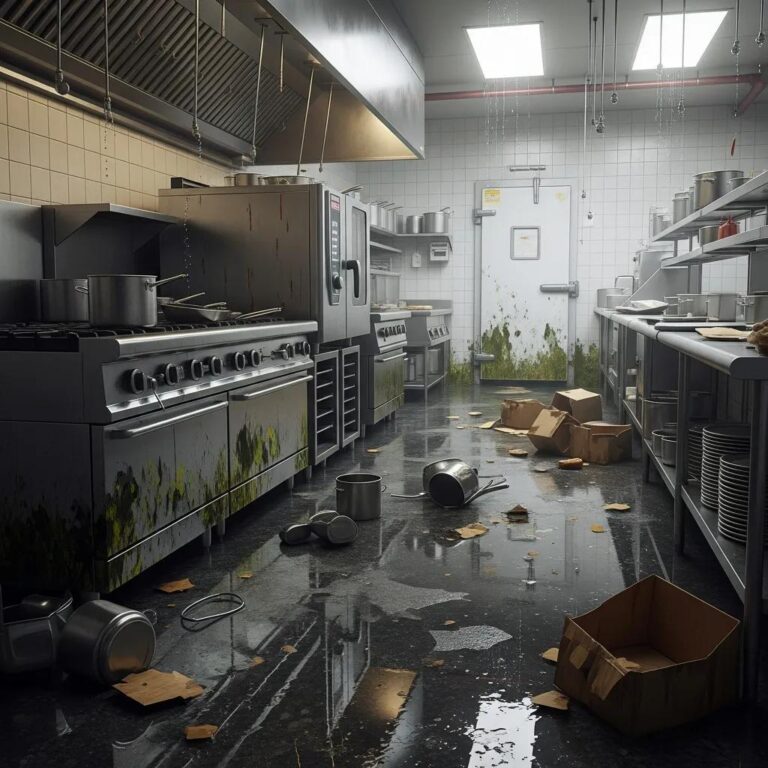
A thorough assessment defines visible and hidden damage by combining visual inspection with moisture mapping and contamination classification, which determines cleanup strategy and safety measures. Inspectors use moisture meters, hygrometers, and infrared cameras to locate damp framing, saturation in subflooring, and trapped water behind walls, and they log relative humidity and moisture content as baseline metrics. Categorizing water as Category 1 (clean), Category 2 (gray), or Category 3 (black/sewage) guides PPE requirements, disposal decisions, and whether contents can be salvaged; for instance, Category 3 often triggers content pack-out and disposal of porous materials. Effective inspection includes documenting affected materials, measuring moisture content daily during drying, and creating a scope report that supports insurance and repair planning. The final inspection phase confirms that moisture targets are met and transitions the project into cleaning and repair phases.
What Are the Key Water Extraction and Drying Techniques?
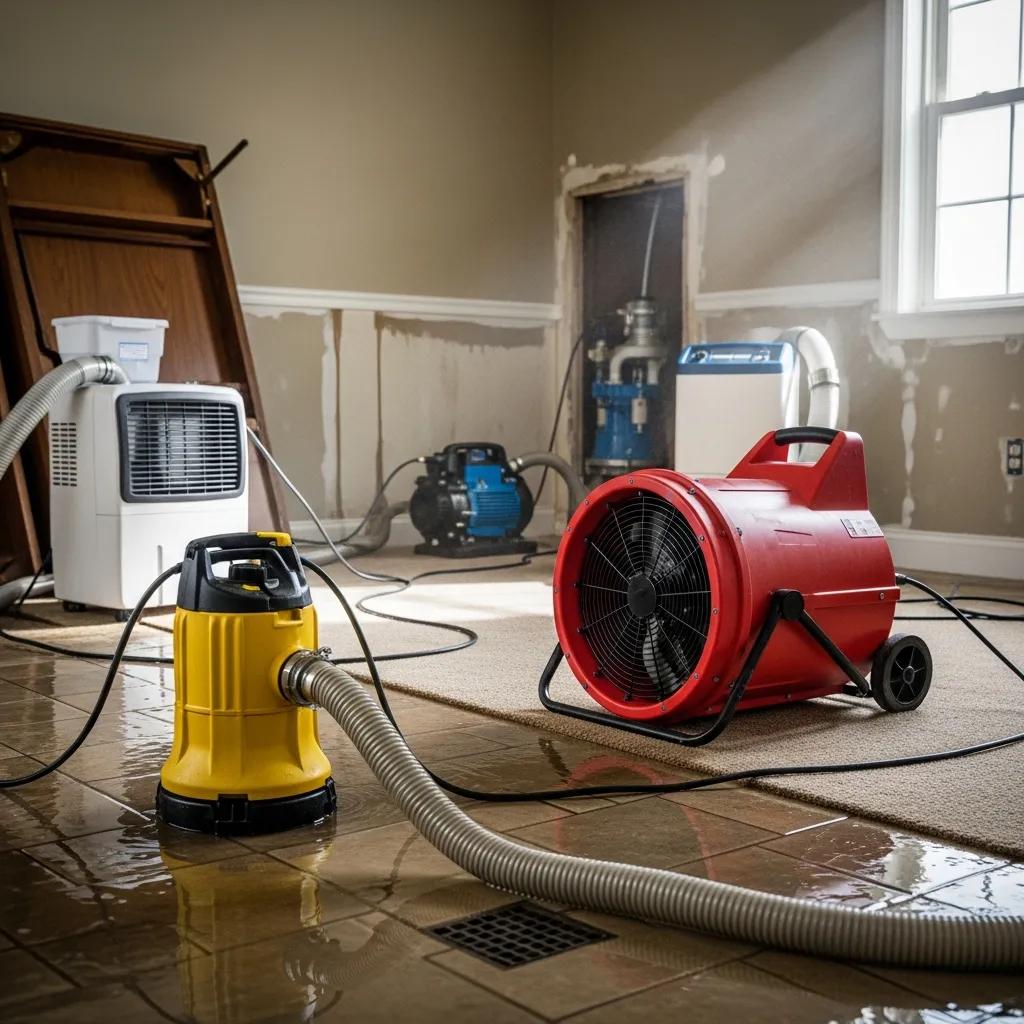
Water extraction and structural drying rely on selecting the right equipment and controlling the drying environment to remove bulk water and residual moisture from building materials. Extraction begins with submersible pumps or truck-mounted units for large volumes, then moves to portable extractors and specialized wands for carpets and hard surfaces, while structural drying uses air movers to increase evaporation and dehumidifiers to remove vapor from the air. Technicians create drying systems based on moisture readings and use temperature control, airflow management, and dehumidification strategies to reach material-specific moisture targets; continuous monitoring ensures adjustments and documents progress. Controlled demolition—such as removing wet baseboards or cutting access holes in wall cavities—may be necessary to expose saturated zones and speed drying, and all actions are recorded to justify repair work and support claims.
How Does the Water Damage Cleanup Process Work?

The cleanup process transforms an extracted and dried structure into a sanitized, safe environment by applying appropriate decontamination, content cleaning, and targeted repairs; the choice of cleaning method depends on contamination level and material type. For more information on the topic, visit our cleaning services.
Cleaning begins with removal of debris and contaminated porous materials, followed by disinfection protocols for structural elements and thorough content cleaning or pack-out for salvageable items. For contaminated water (Category 2 or 3), technicians use specialized decontamination chemistry, HEPA filtration, and controlled disposal practices to protect occupants and prevent cross-contamination. The following bulleted list compares common cleaning approaches, their ideal use cases, and PPE/containment needs to help readers understand which methods apply to different contamination scenarios.
- Cleaning Approach: Disinfection (chemical)Typical Use Case: Surfaces after Category 1 or sanitized Category 2 eventsPPE & Containment: Gloves, eye protection; ventilation
- Cleaning Approach: HEPA vacuuming & air filtrationTypical Use Case: Mold spores, soot, and settled particulates during content cleaningPPE & Containment: N95/respirator, containment barriers
- Cleaning Approach: Sewage decontaminationTypical Use Case: Category 3 blackwater and raw sewage exposurePPE & Containment: Full PPE (respirator, suit), controlled disposal
- Cleaning Approach: Ozone/UV supplementary treatmentsTypical Use Case: Odor mitigation and surface sanitization post-cleaningPPE & Containment: Specialized operation; safety lockout
This comparison highlights how selecting the right cleaning approach reduces health risks and supports safe reoccupation.
Professionals coordinate cleanup with controlled content handling and specialty cleaning for fabrics and electronics; items are inventoried during pack-out, cleaned off-site when feasible, or documented for disposal.
Following cleanup, technicians verify sanitation targets and prepare the structure for repair work by confirming dryness and removing lingering contaminants.
After explaining the general cleanup workflow, it is useful to note how professional restoration providers operate and how that benefits homeowners in time-sensitive scenarios.
24 Hour Flood Fighters provides local emergency response and coordinated cleanup services for residential and commercial properties, with teams prepared to perform inspection-driven cleanup and content handling as described above; homeowners in Nashville and Murfreesboro, TN can request an inspection to evaluate contamination and book an emergency response. Engaging a local restoration provider ensures rapid mobilization, measured drying plans, and documented processes that support insurance claims while prioritizing occupant safety. If immediate assessment is needed, contacting 24 Hour Flood Fighters to schedule an inspection can accelerate mitigation and limit long-term repair costs.
Which Cleaning Methods Remove Contaminants Safely?
Choosing the correct cleaning method depends on contamination category, material porosity, and whether content restoration is feasible, with each method offering trade-offs between salvage and replacement. Chemical disinfection is suitable for non-porous surfaces after bulk water removal, while HEPA filtration and specialized vacuums address airborne spores and settled particulates; both methods require documented application rates and contact times for efficacy. Sewage or Category 3 cleanup requires full PPE, controlled removal, and often disposal of porous materials, because pathogens and toxins can penetrate building materials and contents; this scenario typically triggers pack-out and specialized laundering or disposal. Decision-making balances health risk, restoration cost, and the likelihood of successful decontamination, and technicians document their choices to justify repair paths for insurers and property owners.
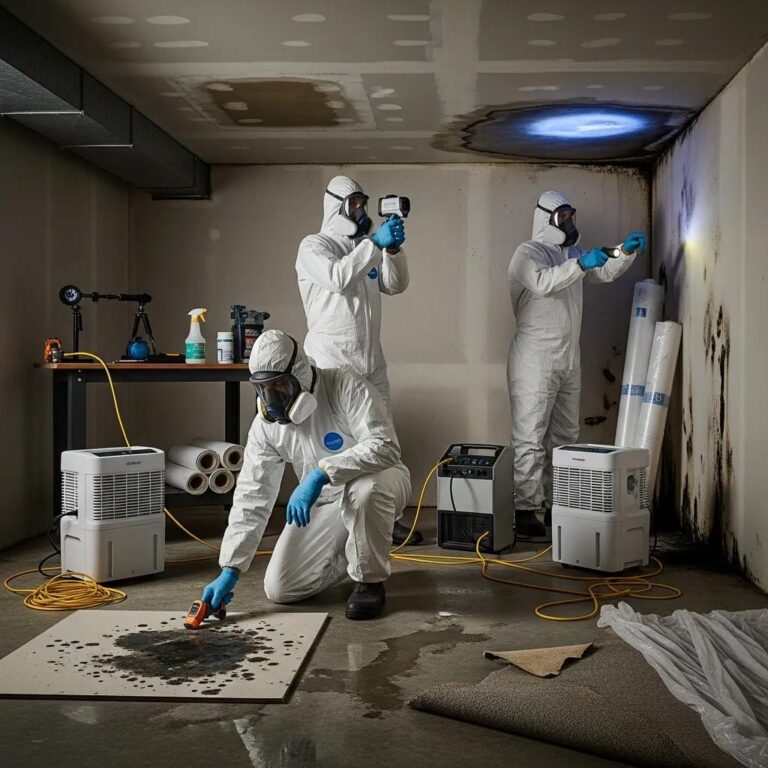
How to Prevent Mold Growth During Cleanup?
Preventing mold centers on rapid moisture control, aiming to reduce relative humidity and material moisture content within the critical 24–48 hour window after exposure to stop colonization. For more detailed guidance on mold prevention and remediation, consult resources like the EPA’s guide on mold cleanup in your home. Deploying air movers and dehumidifiers immediately, removing wet porous materials when necessary, and maintaining airflow across wet assemblies lowers surface moisture and prevents spores from establishing colonies. Target humidity levels are typically below 60% and material moisture content should reach manufacturer or industry benchmarks before closing up cavities; follow-up visual inspections and, when indicated, surface sampling or clearance testing confirm success. Homeowners can support prevention by removing rugs and fabrics from affected areas, documenting conditions, and following professional drying plans that include daily monitoring until final moisture targets are met.
What Is the Water Damage Repair Process?
The repair phase follows successful drying and cleaning and focuses on rebuilding, replacing damaged materials, and returning the property to functional condition while ensuring structural integrity and compliance with building requirements. Repairs begin with selective demolition of unsalvageable materials—such as damaged drywall, insulation, or flooring—then progress through framing repairs, installation of new materials, and finishing work like painting and trim. Material selection emphasizes moisture-tolerant options when appropriate, and contractors coordinate inspections and permits when structural repairs or major replacements are required. Documentation from the mitigation and drying phases informs repair scope and supports insurance claims; accurate records of moisture readings and work performed reduce disputes and speed approval. The next subsections detail the common repair workflow and the criteria used to determine when restoration is complete and safe for occupants.
- Selective demolition: Remove unsalvageable materials and expose structural members for assessment.
- Structural repairs: Reinforce or replace compromised framing, subflooring, and supports.
- Material replacement: Install new drywall, insulation, flooring, and finishes per specifications.
- Finishing and verification: Apply final coatings, complete trim, and perform final inspections.
These steps ensure repairs proceed logically from structural safety to cosmetic completion and enable accurate cost estimation and scheduling.
How Are Structural Repairs and Material Replacements Handled?
Structural repairs follow a documented workflow from assessment to final inspection: evaluate framing and load-bearing elements, remove damaged sections, install new supports or sheathing as needed, and verify work with moisture testing before closing assemblies. Contractors coordinate restoration tasks with licensed trades for electrical, plumbing, and HVAC components to ensure systems impacted by water are returned to code-compliant condition; this coordination reduces rework and hidden failures. Material choices—such as using mold-resistant drywall in moisture-prone zones or engineered flooring with greater dimensional stability—affect durability and future risk, so selection should align with expected exposure and budget. Keeping an itemized scope and photo logs of each repair step helps homeowners and insurers verify that the work completed matches the agreed estimate and technical requirements.
When Is Restoration Complete and Safe?
Restoration is complete when objective moisture and air quality targets are met, visual inspections show no lingering contamination or mold growth, and the structure is restored to functional and aesthetic standards acceptable to occupants and authorities. Moisture meters and hygrometers confirm that wood and building materials are within industry-accepted equilibrium moisture content ranges, and final inspections validate that HVAC, electrical, and plumbing systems are fully operational and safe. When clearance testing is required—such as for mold or biohazard remediation—passing laboratory or on-site tests provides an added verification layer; otherwise, documented moisture readings and visual confirmation are sufficient for most projects. A final walkthrough that reviews repairs, verifies warranties, and hands over maintenance guidance completes the restoration and returns the property to normal use.
What Is the Typical Water Damage Restoration Timeline?
Typical restoration timelines break the project into phases—mitigation, drying, cleanup, and repair—with each phase having customary durations that vary by severity and contamination type. Mitigation (emergency response and extraction) is usually completed within the first 24–72 hours because rapid action reduces secondary damage and mold risk. Drying can take from 2 days to several weeks depending on material saturation, access to affected cavities, and environmental conditions, while cleanup and content restoration require additional time for decontamination, specialized cleaning, and pack-out workflows. Repairs range from a few days for minor finishes to several weeks for structural rebuilds; overall project duration depends on factors such as contamination category, insurance processing times, and construction scope. The following bulleted list summarizes phases, typical durations, main activities, and the parties usually responsible so homeowners can set realistic expectations.
- Phase: MitigationTypical Duration: 24–72 hoursMain Activities: Safety, shutoff, extraction, temporary containmentResponsible Party: Restoration technicians / homeowner
- Phase: DryingTypical Duration: 2–14+ daysMain Activities: Air movers, dehumidifiers, monitoring, controlled demolitionResponsible Party: Structural drying specialists
- Phase: CleanupTypical Duration: 1–7+ daysMain Activities: Disinfection, contents pack-out/cleaning, HEPA filtrationResponsible Party: Restoration technicians / specialty cleaners
- Phase: RepairTypical Duration: Days to monthsMain Activities: Demo, rebuild, finishes, inspectionsResponsible Party: Contractors / trades
This timeline shows how prompt mitigation shortens later phases and why early professional involvement accelerates overall completion.
Factors that commonly extend the timeline include high contamination levels (Category 3 requires more containment and disposal), hidden moisture in wall cavities or under slabs, and delays from insurance approvals or permit processing; proactive documentation and quick decisions about repairs can reduce these delays. Weather and seasonal humidity can also affect drying rates, so climate-controlled drying systems and monitoring are essential for predictable timelines.
How Long Does Each Restoration Phase Usually Take?
Phase durations vary with scale and complexity but follow general ranges that help homeowners plan short-term accommodations and budget for interim measures. Emergency mitigation and extraction are immediate and often completed within a single day or two, while structural drying typically spans several days to two weeks under controlled conditions; severe saturation or slow-drying materials can extend drying beyond this range. Cleanup and specialized content restoration depend on item volumes and contamination—pack-out and off-site cleaning can add days to a week—whereas repairs are the most variable and depend on permit needs, contractor availability, and the scope of reconstruction. Understanding these ranges allows homeowners to coordinate temporary housing, salvage priorities, and financial planning while remediation is underway.
What Factors Influence the Overall Restoration Duration?
Several controllable and uncontrollable variables influence how long restoration takes, including the type of water contamination, building construction and hidden cavities, accessibility for equipment, seasonal humidity, and the speed of insurance claim approvals. Category 3 contamination necessitates more stringent PPE, disposal, and pack-out procedures that lengthen cleanup time, while complex structures with multiple layers or hidden voids require more diagnostic work and potentially controlled demolition for effective drying. Insurance approvals and permit processing add administrative time, and weather conditions influence natural drying rates even when mechanical drying is used. Anticipating these factors and maintaining clear documentation, quick decision-making, and professional coordination reduces overall project delays.
How Much Does Water Damage Restoration Cost?
Restoration costs depend on the scale of damage, contamination category, equipment and labor required, content restoration needs, and any necessary mold remediation or reconstruction; providing a precise figure requires an on-site estimate, but common cost drivers are consistent across scenarios. For general information on filing home insurance claims, you might find this resource from the Insurance Information Institute helpful.
Minor leaks involving a small area and Category 1 water often result in modest remediation and drying charges, whereas large floods or Category 3 events increase scope dramatically due to disposal, pack-out, and specialized cleaning. Below is an itemized cost-component list to help homeowners understand typical line items that appear on estimates and which elements drive the final price.
- Cost Component: LaborDescription: Technician hours for mitigation, drying, cleanup, and repairTypical Impact on Price: High—largest recurring expense
- Cost Component: EquipmentDescription: Rental/use of pumps, air movers, dehumidifiers, HEPA filtrationTypical Impact on Price: Medium—daily rates add up during drying
- Cost Component: MaterialsDescription: Replacement drywall, flooring, insulation, finishesTypical Impact on Price: Medium to high depending on scope
- Cost Component: Content RestorationDescription: Pack-out, cleaning, specialty restorationTypical Impact on Price: Variable—can be significant for valuable items
- Cost Component: Mold RemediationDescription: Testing, antimicrobial treatments, removalTypical Impact on Price: High if mold established
- Cost Component: Permits/InspectionsDescription: Required for structural workTypical Impact on Price: Low to medium but can delay schedule
Understanding these components helps homeowners interpret estimates and anticipate which parts of the job contribute most to cost.
This list provides practical budgeting tips and actions homeowners can take to manage expenses:
- Obtain multiple itemized estimates to compare labor, equipment, and material costs.
- Document damage thoroughly with photos and inventories to support insurance claims and accurate estimates.
- Ask about equipment rental rates and estimated drying days so you can forecast daily charges.
What Are the Main Cost Components in Restoration?
Labor typically represents the largest share of restoration cost because skilled technicians are required for mitigation, monitoring, and cleanup, often billed by the hour or per day; prolonged drying periods increase labor expenses proportionally. Equipment costs—air movers, low-grain refrigerant dehumidifiers, extraction pumps, and HEPA filtration—add daily or rental charges while the site dries, and replacement materials such as drywall, flooring, and insulation drive repair-phase pricing. Content restoration and mold remediation are significant line items when salvageable possessions or mold presence is involved, and administrative costs such as permits, inspections, and waste disposal fees also contribute. Clear itemization on estimates makes it easier to identify savings opportunities, such as salvaging contents or choosing cost-effective replacement materials.
How to Estimate and Manage Your Restoration Budget?
To estimate and manage a restoration budget, gather three itemized quotes that separate labor, equipment, materials, and contents work, document damage with photographs and inventories for insurers, and request projected drying days so you can estimate equipment rental and labor duration. Negotiate by comparing scopes—confirm that all bids include the same tasks and moisture targets—and ask contractors to explain assumptions about demolition vs. repair to avoid scope creep. Reserve contingency funds for unexpected findings during demolition, and coordinate proactively with your insurer to understand coverage limits and required documentation; keeping thorough records of daily readings and work completed speeds approvals and reduces hold-ups. For a local, tailored estimate, contact 24 Hour Flood Fighters to schedule an on-site assessment and receive a documented scope that reflects local conditions and required services.
This article provided the step-by-step water restoration process, inspection and drying techniques, how cleanup methods vary by contamination, realistic timelines with a phase-by-phase table, and a transparent cost breakdown to help homeowners plan and act quickly after water damage.
Conclusion
Understanding the water damage restoration process empowers homeowners to act swiftly, minimizing long-term damage and costs. By following the outlined steps for mitigation, inspection, cleanup, and repair, you can ensure a safe and effective recovery of your property. For personalized assistance and to expedite your restoration journey, consider reaching out to local professionals who specialize in water damage recovery. Take the first step towards restoring your home by contacting a trusted restoration service today.